Using the CFML Jupyter Kernel with VS Code
My notes for how to setup and use the CFML Jupyter Kernel locally with VS Code.
Overview
Pre-requisites
- Download and install Python.
- Install VS Code + Python Extension + Jupyter Extension
- Install CommandBox v5.9.0+ and add it to the system path.
Install the CFML Julyter Kernels
python -m pip install cfml-kernel
python -m cfml_kernel.cfscript.install
python -m cfml_kernel.cfml.install
**Note: Depending on your platform you may need to use the --sys-prefix flag on the last two commands to get VS code to recognize the Jupyter Kernels.
Pre-requisites
Python
The CFML Jupyter Kernel is a Python module so Python is needed to run it. Download and install the version for your platform. You could also use a package manager to install it as well. i.e. On Windows you could use the Chocolatey package manager.
choco install python
VS Code
I will assume if you are reading this you already have VS Code installed. You will also need to install the Python Extension and Jupyter Extension VS Code extensions.
CommandBox
The cfml-jupyter kernel uses the CommandBox REPL so you will need to install version 5.9.0 or greater.
you can download it here. Follow the installation instructions but make sure it is accesible in the system path.
Kernel Installation
The CFML Jupyter Kernel package can be installed from PyPi using pip.
python -m pip install cfml-kernel
Once the module is installed you need to use these commands to install the CFScript and Tag kernels so that Jupyter will recognize them.
python -m cfml_kernel.cfscript.install
python -m cfml_kernel.cfml.install
In Windows I had to install them with the --sys-prefix flag to get VS Code to recognize them.
python -m cfml_kernel.cfscript.install --sys-prefix
python -m cfml_kernel.cfml.install --sys-prefix
Then after restarting VS Code they would be available as a kernel option.
Usage
If all the above goes well, you should be able to create a new Jupyter notebook in VS Code by opening the Command Pallete (Ctrl+Shift+P) then typing New Jupyter Notebook.
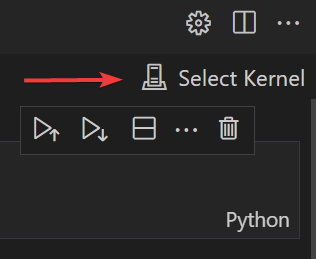
Then click Select Kernel.
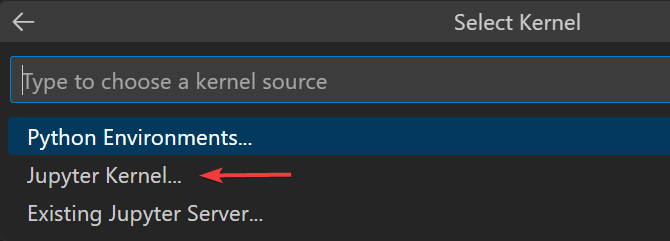
Select Jupyter Kernel…
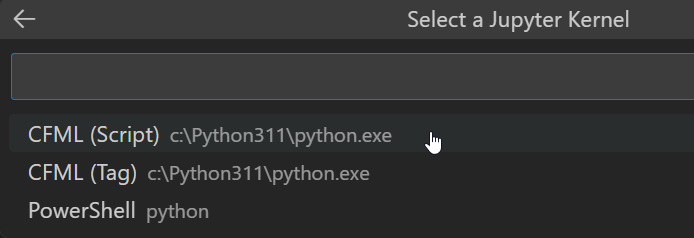
Then choose the kernel that you would like to use.
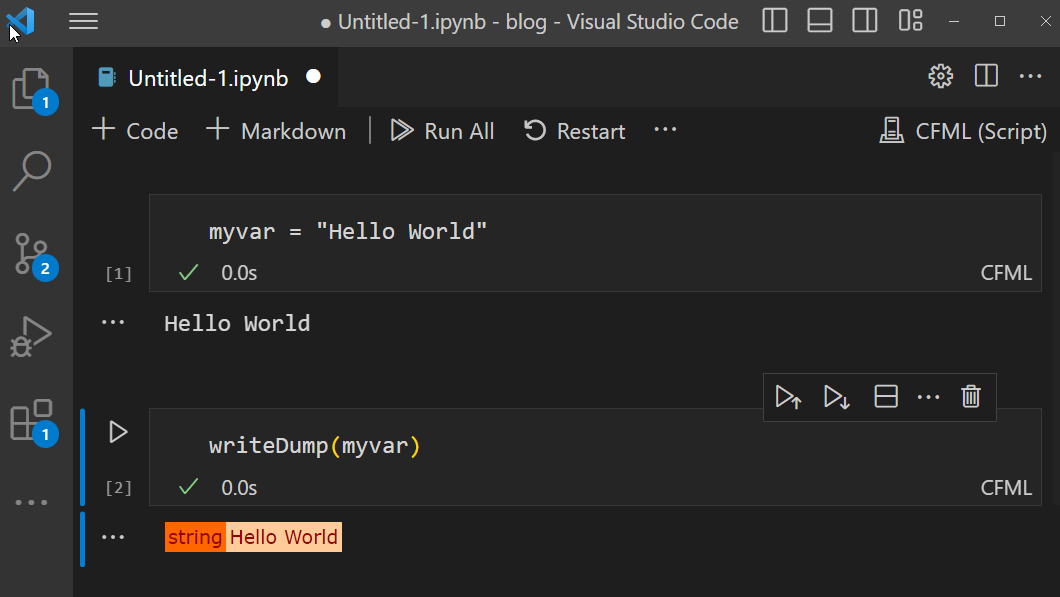
You can then Use the +Code button to add new Code Cells. Type the code you want to execute then click the triangle shaped icon to execute the code. Variables should persist between code cell execution.